Monday, 11 June 2012

DIY Foam Stamps Tutorial


I love making foam stamps, and at the moment I can't stop making them, dreaming about them and using them....how sad is that!!! Actually I find it all quite exciting, haaaha...they're really simple to make and great for stamping on things, so far I've just used them on tags and paper bags...but I would also like to try them out on material, wood and anything else that I can find!!


So here's a list of the things you need, I say 'need ' in the loosest terms as you can so easily use other items to replace the ones below e.g. lollipop stick for foam board.

Equipment
foam board
double sided tape
foam letters
acrylic paint
foam brush


I first decide what I'm going to be stamping on and then cut out the foam board a tad bit smaller, so that it helps me to line the stamp when it comes to printing it....or you could just decide on a word/phrase/symbol and go from there.  If you don't have foam board to hand, you could use a CD disc cover instead, this works great because you can see through so you know exactly where you are stamping your chosen design.


Cover one side of your foam board in double sided tape....carpet double sided tape is brilliant for this, it's really sticky for foam, but apparently not so great for carpets!!! :)  Arrange your words etc the way you want them to look, making sure that they will fit within the foam board you have cut, and then just put the sticky side of the foam board carefully on top and push down, and that's it!!


If your really clever you'll be able to rearrange your letters backwards straight onto the foam board, personally this one is not for me...after six kids and lack of sleep my brain literally wouldn't stretch that far, so I find the first way sooo much easier :)


Now the fun bit, stamping , yay!!  Just a small amount of acrylic paint goes along way, so don't squeeze out too much.  Put a small amount on your foam design using a foam brush being careful not to get it on the sticky foam board, if you do, just wipe it away with your finger...yes, I like getting messy.


Stamp on your chosen item (hopefully not one our your kids) and then decorate however you wish.


As you can see I literally couldn't stop myself, and I still have more ideas to come...so watch this space!!


Thursday, 24 May 2012

Microwave Meringues


Yes, these meringues only take one minute to bake in the microwave and only need 2 ingredients!!!  I use to make these when I was a kid, and loved watching them grow in the microwave :)

So here goes, super quick, so that you can get making some, mmmm.

Ingredients
1 egg white
2 cups icing sugar (approx.)

Mix the two ingredients together in a bowl (I used a medium egg, so if you use a larger/smaller egg then you will need more/less sugar), then keep adding little amounts of icing sugar (if needed) so that you can hold it in your hands without it sticking to you....I find it easier to 'knead' it towards the end on a worktop that's sprinkled with icing sugar, so that it's no longer sticky...and as you can see by my fingers, you do get a tad bit messy, but it's worth it :)


Put some greaseproof paper on a microwavable plate, and make 3-4 small balls (about the size of a 10p) and place in each corner.


Place the plate in the microwave and set the timer for one minute...I have a 700W microwave, so you may need to adjust your timing according to your wattage.  They should hopefully come out looking something like the picture below...just give them a second to cool, peel them off and put aside.  Now roll some more balls and use the same greaseproof paper over and over again, and keep zapping :)


This recipe makes about 24-28 meringues, so there are plenty to go around...now that hard bit is deciding what to go with them.  I chose large dollops of cream and summer fruit, mmm.

Wednesday, 16 May 2012

Faith in God books...for Parents

We've just recently had a new Faith in God leader called and she asked to visit with our eldest two children in our home so she could introduce herself, see what goals they had achieved and to set new ones.  On asking to see the kids books, only one was produced, and the other was lost...again!!  It's probably with all the odd socks and pens that mysteriously go missing in our house...sooo got to find that place one day ;)

Anyway, to help out I got down 'our' copies of the Faith in God booklets that have listed against each goal the date and what the child has done to achieve it.  Our new leader thought this was a great idea, especially as books go missing (quite frequently) and leaders can change.  So I thought I'd share it, in the hope that we can always be one step ahead of those missing books ;)  I keep our copies on a high shelf, so that there's no chance of them getting muddled up with kids ones...or getting lost for that matter!!


I would love to hear what do you do to help your children with their Faith in God goals etc????


Thursday, 10 May 2012

Temple Ordinance Card Holder Tutorial

I use to keep my printed Ordinance Cards on the fridge with a simple magnet, but after being embarrassed handing across one card with a splash of tomato sauce on it, I wanted to make something that would protect my cards but still keep them in a place where I can see them on a regular basis.  So below is the result, it's super easy and fairly quick, and luckily didn't cost me a thing as I had everything I needed to hand, but even if you don't it still shouldn't cost too much :)


Materials needed
clear CD sleeve
card
double-sided tape
adhesive magnet tape


I started by cutting off the flap on my clear CD sleeve (but you might be lucky and yours might not have one), so that I was left with a square...if you look closely you'll see I made the back a bit larger than the front, but this isn't necessary.


I chose some pretty card and printed off the first line to the words of the song 'I love to see the Temple' using a font size of 26 with a free font called 'Daniel' ...this link is great for loads of other free fonts too, they have hand picked a load of free fonts from the web, so definitely take a look.  If you don't have a computer you could write on some words or use stickers instead.

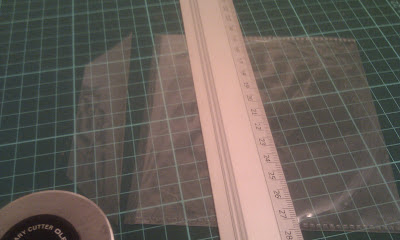
Then I placed my Ordinance Card in the sleeve and placed it on top of my printed words to make sure it was all lined up and central.  I marked with pencil either side at the top of the sleeve, placed a ruler on top and slid the sleeve and then cut with my rotary cutter.  This was then my guide for cutting the rest of my card, I made sure my card slightly smaller than the sleeve to make it fit in nicely without warping.


I then stuck double-sided tape to either side of the card and carefully slid it into the sleeve and stuck it into place, and then attached the adhesive magnet strips on the top and bottom. 


I flipped it over, put my cards in and it was done :)  When my cards are facing outwards I love the fact that the words of the song are so apt for the person on the card.  I hope you like this post, because I've loved the simplicity and easiness of it, but also how effective and pretty it is.

Tuesday, 8 May 2012

He Truly Loves Us

What a giggle we had last tonight for FHE, it was one of those good ones....so here goes :)

Some of the children have been using rude and cheeky words to each other (nothing too serious, in case you're worrying, or wondering), which hasn't made for a nice atmosphere in the home when they've been said, so we decided we needed a conference talk that was apt for this....and Paul E. Koelliker of the Seventy's talk jumped out at me, maybe it had something to do with the title 'He Truly Loves Us'.


I shared how Elder Koelliker had spent some time with two missionaries and as they were reflecting on their day and the people they had met they had these 3 questions....but before I read the quote below I asked everyone to listen for 3 concerns that the missionaries had-
 “How can we help each individual develop a desire to know more about Heavenly Father? How do we help them feel His Spirit? How can we help them know that we love them?”
I actually ended up having to read this 3 times as the two youngest children kept being a distraction (nothing out of the norm there then)...but we got the right answers in the end.  We then jumped to the next story about another couple of missionaries that knocked on somebody's door and got this reaction -
The door opened, and a rather large man greeted them in a less-than-friendly voice: “I thought I told you not to knock on my door again. I warned you before that if you ever came back, it would not be a pleasant experience. Now leave me alone.” He quickly closed the door.
 We talked about how these Elders would have felt and what their reaction could have been....and then we read what they did -
As the elders walked away, the older, more experienced missionary put his arm on the younger missionary’s shoulder to comfort and encourage him. Unknown to them, the man watched them through the window to be sure they understood his message...as he witnessed the expression of kindness between the two missionaries, his heart was instantly softened. He reopened the door and asked the missionaries to come back and share their message with him.
As we discussed how this simple action of Christlike love helped to share the gospel, we shared how our thoughts, actions and words can be an example to others....and now this is where all the giggling begun with our game.

We had one of the children sit at the front of the room with a headband on...or in our case a length of spotted fleece, while another child handed out one small piece of card and pen to each family member.  All of us had to then write a nice word at the top of our card that described the person sat at the front.


One by one we put our card in the headband and tried to describe the word by sharing things the person does to be the word we had chosen and then the person wearing the headband would have to try and guess what the word was...it was lovely to hear everyone share different examples of how this person was being a good example to them, and it was also great because everybody was using good words towards each other...and the children couldn't wait to picked to go next.


You might be wondering where all the giggling came from but we laughed because the fleecy headband made people's hair go funny and kept slipping down, some of the explanations of words were hilarious as were the guesses....I think we will have to remember to play this game again sometime soon, and not just to get our kids to use nice words but to have a good old laugh together :)

We summed the evening up by reminding everyone that we can be good missionaries through the way we act and the words we use, and that through these simple everyday things we can feel His love as will others around us.

Friday, 27 April 2012

DIY Mod Podge

Mod Podge is forever being mentioned on Pinterest and I had no idea what it was, so I found out...and how much it cost, eeek at the latter one.  I was hoping that somebody, somewhere, had 'pinned' a cheaper alternative, and they had, whoopppeee!!!  Pinterest to the rescue again :)

This DIY: Decoupage 'recipe' is soooo cheap, quick and easy that even I was shocked by it, so much so that I couldn't stop telling my fellow crafters all about it the other night whilst I was making a label for it.

I made the label whilst chatting, eating and giggling and hadn't even noticed that I had misspelt it, so I made another one and stuck it on, only to then have it pointed out to me that I had misspelt it again!!  I've actually quite taken a liking to my misspelling so I haven't replaced it as it makes me chuckle whenever I look at it now -


Here is the 'pin' I mentioned earlier with the recipe and instructions - Do It Yourself Divas/DIY: Decoupage

Hope this brings a massive smile to your face each time you use it....because it does me, ooooo, I love a bargain and plodge :)


Monday, 23 April 2012

The Race of Life

What with school holidays, visiting family and our Conference Highlight Night, tonight was our first FHE from the April 2012 General Conference...how time flies!!!


Where better to start than with the prophet's talk entitled 'The Race of Life'.  I focused on the part about the toy boats what with all my kids being young, so after dinner we set off for an adventure to a nearby canal.  Before we reached the water, we stopped to have a little lesson.  I asked the kids if they would be able to sprint to the top of the nearby steep hill, my 10yr old son was sure he would be able to do it, my daughters were not so confident...as we talked about the distant etc he realised that he wouldn't be able to do it either....but they all knew they could walk it, or even jog bits of it, because we had walked to the top several times before. As Thomas S. Monson said -

 “The race is not to the swift, nor the battle to the strong.”10
 Actually, the prize belongs to him or her who endures to the end.

We talked about what the above quote meant, and then shared with the children how President Monson made toy boats when he was a little boy, and that each of them had to find a 'boat' before we got to the canal so that we could race them.  We had all shapes and sizes, one sunk, several got stuck but the rest happily bobbed along the canal while we talked about the boats.  My daughter then read this quote from the talk -

Our Heavenly Father did not launch us on our eternal voyage without providing the means whereby we could receive from Him guidance to ensure our safe return. I speak of prayer. 
I speak too of the whisperings from that still, small voice; and I do not overlook the holy scriptures, which contain the word of the Lord and the words of the prophets—provided to us to help us successfully cross the finish line.

We asked the children what 3 things mentioned help us on our voyage here on earth, which they answered surprising quickly...normally we have to prompt them or reread it...and after that it was time for us to go home as several needed the toilet and one had trodden in something...ewww!!  We ate our treat on the quick march home.

After we all got cleaned up and before we had family prayer, we recapped on our little adventure and finished with this quote -

It is the celestial glory which we seek. It is in the presence of God we desire to dwell.
 It is a forever family in which we want membership. Such blessings are earned through a lifetime of striving, seeking, repenting, and finally succeeding.

The kids, went straight to sleep with no fuss tonight...I think we might have to have more FHE ramblings :)
I really like this bit at the end of the talk too...


I'm so grateful to know where I have come from, why I am here and where I am going, it has helped me so many times during my journey here on earth.....and I also need to remember that it's not a race and to slow down a bit too :)

Saturday, 7 April 2012

Free Facebook Covers

When I was offered a facebook new timeline, I thought why not...but I was a tad surprised that my 'cover' would be available worldwide?!!?!...I personally don't like the thought of my family photos available to anybody, so luckily one of my images from an earlier post (Tuesdays with Morrie) fitted in perfectly, so I used that.


I fancied a change so I made some more this weekend that you are more than welcome to use too, if you want. If you need instructions on how to do this they are below...and I hope they make some sort of sense!! 


...and this one, because I just couldn't resist using these cute buttons :)


Below is how I copy images from the web, I don't know if this is the quickest or easiest way, but it works for me...and hopefully for you :)
Instructions - right click on the 'fb cover' that you like, and select 'save image as...', next click 'save' (you can change the file name before you save if you want).  
Sign into your fb account and then hover over the bottom right corner of your current fb cover till you see 'change cover', choose 'upload photo' from the list and then find the saved image using it's title, press 'open' when you've found it (sometimes it takes me a while to track down what I've downloaded!!).  It will then upload the image and then press 'save changes' and it's done, phewww!!!


Let me know what you think...and any other ideas/links for future fb covers would be great too.

p.s. I have 'windows' installed on my computer so I don't know if it's different for other programs??

Friday, 30 March 2012

Our Top 10 Rainy Day Activities

 I'm really hoping the sun will shine for the whole  two weeks of half term but I have a feeling that the  'April Showers' will make an appearance soon :(  So I find it really handy to have a few games/activities that are quick and easy, and will help to disperse the feelings of cabin fever....even if it's only for a few minutes.  Below are mine and the kids top 10...and they work, most of the time!!

1. Keep Fit Stations - make several posters of different fun exercises that kids can do and then stick them around the house...put some music on and let the kids go from one station to the next.

2. Spring Cleaning - give the kids a wet rag each, and ask them to wipe down surfaces, doors and skirting etc....I know it sounds like slave labour but my kids love it!!  And if they are a bit older, give them the real cleaning sprays...my kids go to town when they have these and clean everything in sight...I actually have to ask them to stop, would you believe it!!
3. Make their own board games - stick several pieces of paper together to make a large game board, give the kids some felt tips/crayons and let them go for it.  We've had princess, aliens, trivia and not quite sure what games :)  Some of ours are still being used a couple of years on.


4. Wallpaper murals - Get a roll of plain lining paper and unroll it and let the kids draw a never-ending mural...and what's wonderful is they can keep going to their hearts content.  It's also great for them to show you what they've been learning at school, my kids did one and then took it to school to show in assembly....if I'd realised this was the outcome I wouldn't have been so flamboyant in my drawings, hahaa!
5. Movie time - an all-time classic, we rearrange the furniture, put on a movie, turn down the lights, and cuddle up with treats and popcorn....and you might even be able to sneak in a little nap too, woohoo!!
6. Card and craft making - make and decorate a card for a relative, neighbour or friend, then post it when the sun comes out...or let the kids go crazy with your recycling, some glue and sticky tape.
7.  Baking - I can't say I've done alot of baking with all 6 kids at once, normally only a few are interested at the time...but all six have enjoyed the finished product, mmmmm!!
8. Build a tent - yep, you've guessed it, get all the blankets, duvets and a stash load of pegs and turn an area/room into a soft, comfortable but somewhat haphazard tent. 
9. Lunch abroad - eat your lunch/snack in a room you wouldn't normally, the kids will love the change of location and hopefully you will squeal with excitement too.
10. Invite friends over - I know this might seem like you are putting more fuel on the fire, but 90% of the time this actually works out for the best...my house has actually been quieter and calmer with 11 kids than it is with my 6!!!  Who would have thought it!!?!?!

I hope you and your brood have fun during the upcoming April showers??!!?  
Good luck :)

Friday, 23 March 2012

Tell Me the Stories of Jesus


After hearing this talk in General Conference in April 2010, I made the chart below for help us to read and study John in the New Testament...each of the squares represent a page in the LDS edition of the Kings James Bible.


As you can see it has also been used to practice spellings on and just general scribbles, makes it look loved, don't you think??!!?...I made a simpler chart below where one letter can be coloured in when a chapter is read.  Feel free to copy the image and photocopy it for personal use.


This is the bit from Neil L. Andersen's talk that mentions reading the book of John....the rest of the talk is lovely too - 
Do our children say, “Tell me the stories of Jesus I love to hear”? 33
To the youth and children: Live up to your important responsibilities and great spiritual capacities. Seek to know more about Jesus; open the scriptures. One idea would be to read again the book of John and then discuss it with your parents, teachers, and each other.
Our family have really felt the spirit and a greater love of the Saviour as we have read, we have yet to finish...but we are loving every minute of it.