Tuesday, 4 September 2012

Raspberry and Blackberry recipes

Berry picking will soon be upon us and I can't wait!!!  I made jam for the first time last year and loved every minute of it, even the two and a half hours I spent walking round the local countryside trying to find berries on bushes (my husband says I do anything to save a penny or two, I just can't resist a bargain!!), it was soooo worth it :)

This year I thought I'd still like to make some jam but also something else....and that 'something else' is what I have been on a quest for.  I only have wild raspberry and blackberry bushes growing near me, so obviously I only found recipes that include these, and oooo it was hard to pick!!  But here's my collection of fruity delights, so now when the time arises I can easily peruse through and let my taste buds decide on my 'something else' mmmmm..............

Raspberry Pie
                                                                         Raspberry Pie

4.jpg


Freezing raspberries. Credit: Neil Hepworth/RHS

Blackberry coulis

Blackberry honey creams

Blackberry Crumb Bars

Now come on berries and hurry up and ripen!! ;)


Wednesday, 22 August 2012

50 Songs from the 1970s LDS Friend magazines


Yep, the photo above is of me from the '70s...moving on quickly then!! :)

Well I've recently been called as our Ward Music Chairman and have been rooting around the internet for some additional songs that our choir or smaller groups could sing, and I thought where better to start than the Church website.  I've been at it for 3 hours and I've only managed to list the songs in the Friend magazine from the 1970s!!...and three of those years didn't even have any songs!!!

Some of the songs listed can now be found in the Hymn book or the Children's Songbook but I have still included them as sometimes they have different piano arrangements, there's even a piano duet for 'I Hope They Call Me on a Mission'.  

Key
simp. version = simplified/easy version
1v = one verse to the song, 2v = two verses and so on.

1973
The Golden Plates (2v) Jan 
Saturday (1v) Mar
I Know That My Redeemer Lives (simp. version, 1v) April 
Oh, How Lovely Was the Morning (simp. version, 1v) May                 
Father, We Thank Thee For The Night (1v) June 
Come, Come Ye Saints (4v) July 
Come, Listen to a Prophet's Voice (1v) Aug 
Come, Ye Thankful People (2v) Nov 
Christmas Song (3v) Dec 

1974
I Am My Heavenly Father's Child (2v) Feb
In Humility, Our Saviour (1v) Apr
I Hope They Call Me on a Mission (2v, secondo and primo) May
I Pray to My Heavenly Father (1v) June 
My Country (2v) July
Come, Follow Me (1v) Aug
Repentance (1v) Sept
A Child's Prayer (3v) Dec

1975
Word of Wisdom Promises (3v) May
Fathers (3v) June
My Flag, My Flag (1v) July
Come, Ye Children of the Lord (3v) Aug
Keep the Commandments (1v) Sept
When He Comes (2v) Oct
Children All Over the World (1v) Nov
Lullaby (1v) Dec

1976
Have a Very Happy Birthday (3v) Jan
Our Easter Song (1v) Apr
My Father Taught Me (3v) June
Blessed America (1v) July
Lullaby (3v) Aug
We Thank Thee (3v) Nov
Who Is the Child? (2v) Dec

1977
Other Sheep Have I (1v) Jan
Did Jesus Really Live Again? (3v) Apr
Repentance (2v) June
When Jesus Christ Was Baptized (2v) July
When Jesus Was on Earth (3v) Aug
Love One Another (1v) Sept
When Joseph Went to Bethlehem (3v) Dec

1978
Easter Day (1v) Mar
Hear the Raindrops (3v) Apr
When Mother Bakes (2v) May
Pioneer Children (3v) July
Hymn of Thanks (3v) Nov
Have a Very Merry Christmas (3v) Dec

1979
Come, Follow Me (piano duet) Apr
Building a Temple (1v) May
My Evening Prayer (2v) June 
Thanksgiving Song (2v) Nov
Little Jesus (2v) Dec

 These songs can be great for FHE, ward choirs, or as musical items.  I will hopefully get around to finding and listing the other songs from the magazines too....but feel free to do it and if you do, pleaseeeee let me have the link, thank you :) 

Monday, 20 August 2012

Choose The Right FHE

Tonight we did a bit of a reminder of the Primary theme for the children...and us, which is 'Choose the Right'.  This was one of my quick, it's FHE night what can we do!! 

So I taped several pieces of card together and drew a 'strait and narrow' path down the middle and glued the picture of the Saviour at the top.  I also cut out some little green strips of card that fit in the path (you'll see these later).


We started our FHE by singing Choose the Right #239, then after the prayer we talked about ways we could stay on the strait and narrow path so we could get back to live with Heavenly Father and Jesus.  One by one a member of the family wrote down on the card (pictured above) our answers and explained why we had chosen it...they wanted to keep writing down answers but we'd never finish the lesson if they did!!

We then turned to the scriptures and read the following verses from 1 Nephi chapter 8 -


 19 And I beheld a arod of iron, and it extended along the bank of the river, and led to the tree by which I stood.
 20 And I also beheld a astrait and narrow path, which came along by the rod of iron, even to the tree by which I stood;

We talked about the story of the tree of life and how people had to hold on tight to the rod of iron so that they wouldn't stray from the path.  Then we turned to 1 Nephi 15: 23-24 to find out what the rod of iron represented -


23 And they said unto me: What meaneth the arod of iron which our father saw, that led to the tree?
 24 And I said unto them that it was the aword of God; and whoso would hearken unto the word of God, and would bhold fast unto it, they would never perish; neither could the ctemptations and the fiery ddarts of the eadversary overpower them unto blindness, to lead them away to destruction.

Next we handed out the little green strips of card as we discussed how we could hold fast to the word of God, and different ways we could hear/read/see/feel the word of God...and shared our thoughts as we wrote down our ideas.


During the week we are going to stick these green strips on our path as we do them, so we've already done our Family Home Evening one :)  So hopefully this week we will all get stuck into our scriptures, the Friend, Ensign etc. and work towards drawing closer to the Saviour through the word of God.


Refreshments was a biscuit with icing on that we all decorated with sweets to make happy smiley faces on....because when we choose the right we feel happy :)  Especially with all this sugar on just one biscuit!! ;)


I really like the FHE lessons where we have a reminder of what we've learnt during the week, I know it helps me to stay on track and I hope and feel that it helps my family feel the same.

Friday, 17 August 2012

Tuna Pasta Salad


I like to have a nosey at the salad bar for inspiration for dishes I can  make at home for cheaper and in bulk!!  So this recipe is the product of one such nosey :)  This dish is great for hot days (and/or stressful ones) as it doesn't take too long to cook, so we always have this a lot in the summer.

Ingredients
500g pasta
2 cans of tuna (185g), drained
1 can of sweetcorn (325g), drained
1 green pepper, cut into small chunks
1 cup of salad cream

Cook pasta and drain...just a note - I like to add a dash of olive oil to the water while the pasta is cooking, I have no idea if this helps it not to stick together, but I do it anyway lol!!

Add the rest of the ingredients and mix well, it's ready to be served :)  If you are going to eat it cold, let it cool down first before covering it and then store in the fridge.  Just before serving, add a little more salad cream to 'freshen' it up.

Enjoy!!

Monday, 13 August 2012

Fruity Croissant Pudding


My brother-in-law made this for us at Christmas and it was so delicious we were all fighting over seconds, it was not a pretty sight!!!  You just need croissants, custard and fruit but don't underestimate the yummiest of this simple combination, mmmm mmm mmmm :)

Ingredients
6 croissants
1 1/2 - 2 cup of soft fruits e.g. raspberries, blueberries
1 pint custard
sugar or caster sugar for dusting

Preheat your oven to Gas Mark 4/180C/350F.


Tear up the croissants into bite-size pieces to cover the base of your dish...my dish measured 12"x 9". 


Scatter on your chosen fruit over the croissants....blueberries and raspberries work well together or I used a frozen summer fruit mix this time.


Pour your custard all over, making sure that everything gets covered.  Let it sit for 5 mins before cooking, so that the croissants get a chance to soak up some of the custard. 


Sprinkle a little sugar all over just before putting in the oven...I just used granulated, but caster or brown sugar should work just as well.

Put in the oven for 25-30 mins...now enjoy with anything creamy :)  

Friday, 20 July 2012

Simple DIY Pamper Gift


I've just finished making 13 of these for the children's teachers at school and nursery, and they all seemed to love them....and they only cost me 50p each!! :)


Each one contained a shower puff and a coloured bar of soap...


I wrapped them in cellophane and tied with ribbon and/or string...to alternate it a bit I cut some tissue paper slightly smaller than the cellophane and then wrapped them up, it's hides what you are giving and also adds a bit of colour if needed.  Cellophane is one of the best things I've ever bought to fancy things up a bit, definitely worth the investment...I bought a roll of clear wrap from my local florist.


I made a DIY stamp for the tags, click on link for my DIY foam stamp tutorial and then just wrote in pencil the word 'pamper' underneath.  The kids then wrote a message to their teachers on the back.  Yeahhh, job done...and since it's now the summer holidays I think I might just treat myself to one of these pamper kits too :)

Saturday, 7 July 2012

Portuguese Chicken and Potato

My lovely Portuguese friend is a fabulous cook and constantly tantalizes my taste buds with her dishes.  The other day she forgot I was coming over for lunch and so she quickly threw a dish together with me watching trying to take mental notes of everything she was doing.  Needless to say it was delicious and is now a favourite in our home too.  In our house we call it 'Maria's chicken'.....for some reason we name our dishes after the people that introduced us to them, so we also have a Tait cheesecake, Sister Win's soup and Nanna's noodle soup!!

Ingredients
6 chicken drumsticks or 4 chicken breasts
1 onion, chopped
4 cloves of garlic
1kg potatoes, peeled and cut into bite-size chunks
2-3 tablespoons olive oil
1 tablespoon vinegar
freshly ground salt and pepper
1 teaspoon cumin
1 teaspoon paprika
flat leaf parsley, big handful


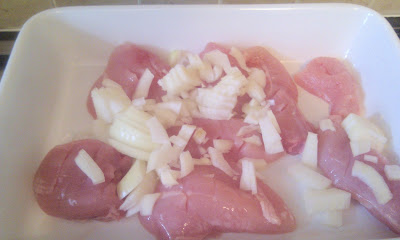
Put the chicken in an oven proof dish and do a couple of little cuts into each piece of meat to help the flavours infuse into it.  Add the chopped onion and garlic.


...I like to use a pestle and mortar to grind my garlic for this recipe (cause that's the way Maria did it, and somehow for me adds to the yumminess of the dish).  It's also a great way to relieve some stress!!


Next add your potatoes to the dish, then throw on your 1-2 tbsp olive oil and 1 tbsp vinegar and give it a good stir to make sure everything is coated.  
Sprinkle your 1 tsp of cumin and 1 tsp of paprika, with your freshly ground salt and pepper and a big handful of flat leaf parsley (cut up ever so slightly....I quite like mine big, but do it however you like), then give it a good stir again.
Now this is the best bit, cover it over with cling film or foil and let it marinate for at least 1/2 hr...I love making this dish in the morning and having the wonderful aroma just waft through my house all day...it's worth making this dish just for the smell alone lol!!  


Once marination is complete and you've wiped the dribble from your chin, put in the oven on Gas Mark 6/200C for 20-30 mins till chicken and potato are cooked through.  This is one of those meals that once you've cooked it once, you can literally glance at the recipe card next time and just quickly throw it together, it's great for so many reasons...hope you enjoy it as much as we all do xx


Monday, 11 June 2012

DIY Foam Stamps Tutorial


I love making foam stamps, and at the moment I can't stop making them, dreaming about them and using them....how sad is that!!! Actually I find it all quite exciting, haaaha...they're really simple to make and great for stamping on things, so far I've just used them on tags and paper bags...but I would also like to try them out on material, wood and anything else that I can find!!


So here's a list of the things you need, I say 'need ' in the loosest terms as you can so easily use other items to replace the ones below e.g. lollipop stick for foam board.

Equipment
foam board
double sided tape
foam letters
acrylic paint
foam brush


I first decide what I'm going to be stamping on and then cut out the foam board a tad bit smaller, so that it helps me to line the stamp when it comes to printing it....or you could just decide on a word/phrase/symbol and go from there.  If you don't have foam board to hand, you could use a CD disc cover instead, this works great because you can see through so you know exactly where you are stamping your chosen design.


Cover one side of your foam board in double sided tape....carpet double sided tape is brilliant for this, it's really sticky for foam, but apparently not so great for carpets!!! :)  Arrange your words etc the way you want them to look, making sure that they will fit within the foam board you have cut, and then just put the sticky side of the foam board carefully on top and push down, and that's it!!


If your really clever you'll be able to rearrange your letters backwards straight onto the foam board, personally this one is not for me...after six kids and lack of sleep my brain literally wouldn't stretch that far, so I find the first way sooo much easier :)


Now the fun bit, stamping , yay!!  Just a small amount of acrylic paint goes along way, so don't squeeze out too much.  Put a small amount on your foam design using a foam brush being careful not to get it on the sticky foam board, if you do, just wipe it away with your finger...yes, I like getting messy.


Stamp on your chosen item (hopefully not one our your kids) and then decorate however you wish.


As you can see I literally couldn't stop myself, and I still have more ideas to come...so watch this space!!


Thursday, 24 May 2012

Microwave Meringues


Yes, these meringues only take one minute to bake in the microwave and only need 2 ingredients!!!  I use to make these when I was a kid, and loved watching them grow in the microwave :)

So here goes, super quick, so that you can get making some, mmmm.

Ingredients
1 egg white
2 cups icing sugar (approx.)

Mix the two ingredients together in a bowl (I used a medium egg, so if you use a larger/smaller egg then you will need more/less sugar), then keep adding little amounts of icing sugar (if needed) so that you can hold it in your hands without it sticking to you....I find it easier to 'knead' it towards the end on a worktop that's sprinkled with icing sugar, so that it's no longer sticky...and as you can see by my fingers, you do get a tad bit messy, but it's worth it :)


Put some greaseproof paper on a microwavable plate, and make 3-4 small balls (about the size of a 10p) and place in each corner.


Place the plate in the microwave and set the timer for one minute...I have a 700W microwave, so you may need to adjust your timing according to your wattage.  They should hopefully come out looking something like the picture below...just give them a second to cool, peel them off and put aside.  Now roll some more balls and use the same greaseproof paper over and over again, and keep zapping :)


This recipe makes about 24-28 meringues, so there are plenty to go around...now that hard bit is deciding what to go with them.  I chose large dollops of cream and summer fruit, mmm.

Wednesday, 16 May 2012

Faith in God books...for Parents

We've just recently had a new Faith in God leader called and she asked to visit with our eldest two children in our home so she could introduce herself, see what goals they had achieved and to set new ones.  On asking to see the kids books, only one was produced, and the other was lost...again!!  It's probably with all the odd socks and pens that mysteriously go missing in our house...sooo got to find that place one day ;)

Anyway, to help out I got down 'our' copies of the Faith in God booklets that have listed against each goal the date and what the child has done to achieve it.  Our new leader thought this was a great idea, especially as books go missing (quite frequently) and leaders can change.  So I thought I'd share it, in the hope that we can always be one step ahead of those missing books ;)  I keep our copies on a high shelf, so that there's no chance of them getting muddled up with kids ones...or getting lost for that matter!!


I would love to hear what do you do to help your children with their Faith in God goals etc????